Foxy Foldaway Washline: DIY Installation Guide
Thank you for choosing our product. Please read these foldaway washline installation instructions carefully from start to finish before you begin to ensure a safe and secure installation.
Total Time Needed: +/- 45 minutes
Required Tools
Before you begin:
First, open your kit and confirm you have all the correct components for your specific model.
Main Components
Fittings & Fasteners (1.5m model)
Fittings & Fasteners (2.0m & 2.5m models)
Choosing the Right Location
A) Wall Suitability
This kit is designed for solid walls like standard brick, concrete, and plaster over brick. The 1.5m model can also be installed on vibracrete walls.
Important: The supplied M6 wall plugs are for masonry walls only. For installation on wood, use appropriate wood screws (not supplied) and ensure you are fixing into a solid stud.
B) Installation Height & Space
Before you begin, mark a level line on your wall at your desired height. The recommended height is approximately 1.8 meters (or slightly above head height) from the ground. The bottom screw of your side arm will be on this line.
Ensure you have at least 60cm of clear space directly below the installation point for the washline to fold down correctly.
STEPS TO INSTALL:
1. Fix the First (Left) Side Arm
a) Mark Holes
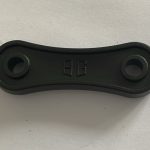
Take one Base Plate and position it vertically on the wall so its bottom hole is on your 1.8m height line. Mark the centre of the two bracket holes.
b) Drill and prep
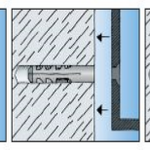
Drill both spots with the M8 drill bit and tap an M8 wall plug into each hole.
d) Mount the Arm
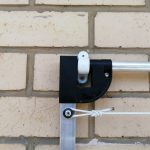
– Place a Base Plate over the bottom wall plug. Position the saddle bracket over it and loosely fasten with one 8mm x 50mm screw.
– Gently flex the bracket open and slot the Left Side Arm (‘L’) into it, ensuring it rests against the stopper screw.
– Insert the second 8mm x 50mm screw and securely tighten both screws. Do not over tighten, the objective here is to restrict movement.
2. Fix the Second (Right) Side Arm
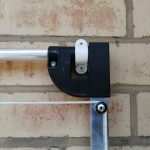
Position for Levelling: Take one crossbar tube and slot it into the corner piece of the mounted Left Side Arm. Slot the Right Side Arm (‘R’) onto the other end of the crossbar.
Level the Assembly: Hold the Right Side Arm against the wall. Place your level on top of the crossbar. Adjust the arm up or down until the bubble is perfectly cantered.
Mark and Mount: While holding it level, mark the wall for the Base Plate, exactly as you did in Part 1. Then, set the arm aside, drill the holes and mount the Right Side Arm securely.
3: Install Center Support (2.0m & 2.5m Models Only)
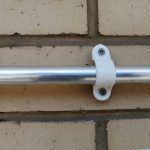
Find Centre: Measure and mark the exact centre point of the top crossbar.
Position Bracket: Place the 20mm Saddle Bracket on the wall directly under your mark, so its top touches the bottom of the crossbar. Mark its two screw holes.
Secure Bracket: Drill the two spots, insert M6 wall plugs, and secure the bracket flush against the wall using two 8mm x 38mm screws.
4: Install and Secure All Crossbars
5: Fix the Folding Supports
This must be done for both Left and Right sides.
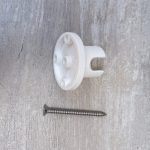
Attach Support Arm: Insert the support arm into the Socket holder and lift the support arm until the washline frame is in a level position. Mark the centre spot, drill, insert wall plug, fix to wall using a 8mmx 50mm screw.
Repeat: Repeat this process for the other side arm.
6: String the Washline Cord
This must be done for both Left and Right sides.
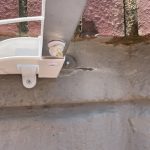
▶️ Start: Tie a double knot at the start of one side of the line, then thread the other end of the line starting from the back.
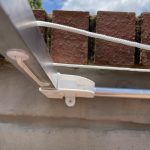
▶️ String: Take the cord across to the matching line holder on the opposite arm and thread it through the top of the line holder. From the same side, move to the next line holder and thread from the bottom up. Repeat this (across, thread down, next, thread up) pattern until you reach the end.
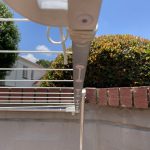
▶️Tension: Tie a temporary knot at the end. Go back to the first line and pull horizontally to pick up the slack, move to the next and repeat this for each line, moving all the slack down to the very bottom line.
▶️Finish: Important: Do not overtighten. The lines should be firm, not rigid. Untie the temporary knot, pull the final slack through, and tie a permanent double knot. Cut any excess cord and burn end to neaten.
Final Checks & Operation
Folding
To fold the washline down, simply lift the horizontal arms slightly to disengage the supports from the Round base socket, and gently guide the arms down.
Safety
Check all screws and bolts are tight before first use. Do not overload the washline or allow children to swing on it.